Sunday, October 12, 2014

A children's wonder garden

We're on a week's holiday in the tropics and Mr Jones is reminded that his favourite technology is the combination of a note pad, a pencil and an eraser (or erasable pen this week).

Here's a sketch of what happens if you've got nothing to do other than sit with your own thoughts and a sketch pad for a few days.  It's a first pass on our version of Mr McGregor's Garden for our (soon to be) two boys.

So what is this jumble of scribbles?

Well as you might remember from previous posts, we've got a odd shaped block (triangle) as a result of a planning decision made back in around 1921.  This poses a lot of constraints but, constraints can also be a great thing to push your creativity.  Indeed if we had a rectangle, we wouldn't have come up with this design for the back corner.

The first thing we did was work out the constraints:

  1. Dimensions 
  2. Infrastructure (the shed, soon to be man cave for Mr Jones), gas meter, fences, access points etc
  3. Shade lines - where will the sun get to at the peak of summer, winter and spring?  Where is the desirable sun to be harnessed and the undesirable sun to be calmed?
  4. Water flow (in our case a mild fall from the front of the block south east to the south west corner)
Then we did a first design to optimise for sun / shade:
  1. Shade for the man cave to the west to avoid it becoming an oven in summer and needing a lot of energy to cool
  2. Garden beds on the south boundary (will get full year's sun, but also summer shade because of the triangle shape)
  3. Other garden beds aligned to fence lines and on shade lines at various times of the year
  4. Flow, zones and hidden "rooms" for the kids to run around and get lost in
  5. Herb beds to insulate the edges of the concrete slab of the man cave
As you can see from the scribbles, and erase marks this plan has been worked and reworked quite a few times now.  Things have been added, deleted, moved around.  And no doubt it will be revised again before finalising.

In fact, here's an updated version that was done just while writing this blog.  Can you spot the differences?


We thought we'd share the process a little in case it sparks any ideas for you at your place.  If you feel inclined, click on some of the "drawings of a madman" for a closer view and see what ideas they spark for you... actually stop reading and do this now.


Yes, now.


Done?


Great.


We can't wait to get home and start marking out string lines to see it at scale.  And we'll post a few pics so you can see how it's coming together, possibly with some updated sketches.

In the mean time, if anyone's got any experience in applying the principles of wicking garden beds and root-level watering to ordinary domestic lawns, please post a comment below and let us know.  It's something we're keen to have a play with in our hot, dry summary climate.  We start earthworks in around 4-6 weeks.

Monday, September 29, 2014

Big plans

So all of the courses we've done tell us to step back, do a site analysis and think about things like infrastructure, prevailing winds, sun etc before racing in and putting things in the wrong spot etc.

It's spring so we can't stand waiting any more and have got our hands in the dirt.  But to put it all in context we thought we'd share our rough site analysis and rough plans.

Got any great ideas, let us know.  We might just try them out and tell you how they went.


As you can see the site is an odd shape, with buildings in odd spots and covered in an extraordinary number of large eucalypts.  From the main road, you can see our place form nearly a kilometre away because its the one with the outrageous amount of tall tree canopy.  How exciting.

Of course big trees provide challenges and opportunities so we'll be working through those and sharing some of the results.

The plans are evolving, but here's the rough mud map of what we're planning.  This seems to evolve daily, but here it is for now.


Anyway enough of the technical stuff, we'll be back shortly with ideas and experiments.

Wednesday, August 6, 2014

Water efficient shower heads that give a great shower

One of our definitions of luxury is a great shower.

Mr Jones has been travelling a lot since we moved to Adelaide which means lots of nights in various hotels and some very ordinary showers.

About a month ago we were staying in a hotel and the shower was excellent, somehow misting the water intend of streaming it.  The result seemed to be better soaking and less air between the water jets.   We made a mental note of the shower head (must get one of those one day), but didn't pay close enough attention to brand etc.

This week our shower broke, so we thought we'd find one of these things to replace the shower head.

Off to Bunnings and we came across a thing called a Methven santinjet which looked a bit like it might be the thing we could vaguely remember.  We were surprised and more than a bit happy that the flow rate was 7.5L/min instead of the normal efficient 9.0L/min.  It was about double the price of most of the other ones ($100 instead of $50), but happiness is a great shower so we decided to take a punt.

We're not sure if it was the same one, but we're very happy with it and thought it was blog-worthy.  It's not only great shower, but uses 16% less water, which means you can save water or stay in longer.  Hooray.

This is them.  Ours is the generic looking round one.

http://satinjet.com.au


We're back

It's been quite a while since we posted anything on here.

We ended up selling the house, moving to a rental in Melbourne, having a baby, moving to a rental in Adelaide and now we're finally home owners again and going through a similar journey with retrofitting an old house - this time a 1920's sandstone bungalow in the heart of suburbia.

We moved in in December and already have done a lot of things to to the house so have plenty to talk about.  We'll post as we get time.

Tuesday, February 22, 2011

Reducing landfill

Be careful thinking too much about closing the loop, it can mean you will redesign your place many times to try to turn waste into useful inputs elsewhere in your plot.  Next thing you know the only place which makes sense is to move your chicken coop immediately uphill from your vegie patch so that soil nutrients become a valuable input every time it rains rather than a pollutant for someone else.

It also means when you get your waste guide from the Council, you're likely to down tools and read it cover to cover.  That's what we did.  (Sigh).

Increasingly councils are encouraging people to cycle their waste through recycling.  There's lots of good info in the Council's guide on this, but for us, today's gem was about landfill.

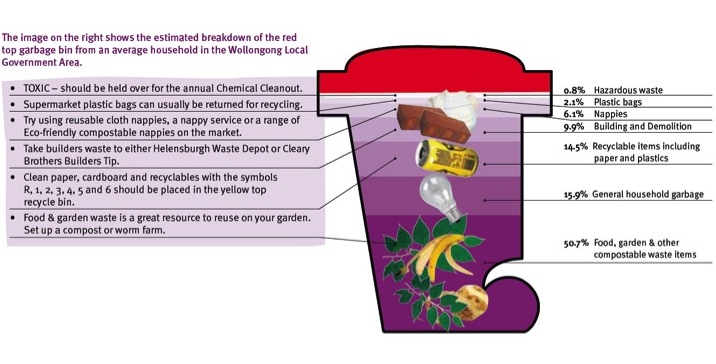
Landfill is basically the stuff that isn't reused or recycled - the loop isn't closed, and it becomes someone else's problem to deal with.  Through households separating things out, landfill has reduced, but the reality is that the average household still sends 740kg to landfill each year (that's nearly the weight of a small car, every single year - imagine trying to bury that in your back yard).

What surprised us was that the biggest portion is good compostable goodies which could be used to build soil rather than generate methane (a potent greenhouse gas) at the tip (see diagram below).
We always thought that it would be good if people were charged for how much rubbish they generate, and rewarded if they generated less.  In today's guide we realised they kind of are.

In our council area (Wollongong), once a year you can change the size of your general waste (landfill) bin.  Larger bins cost more, smaller bins cost less.

We currently have a 120L wheely bin, which rarely has much in it.  By changing down to a 80L bin (reduction by 1/3), we save $79 a year and, get a nice visual prompt to stop generating so much waste and give the neighbours something to talk about.  Lovely.

If you're in the Wollongong Council area, send in this form before the end of February and there's no charge for the changeover.  You can always change back (for a fee) if things get out of hand, or change again for free next year.

If you're not in our Council area, why not check with your Council and see what you can do.

Our Council doesn't do the same thing for other bins yet (recyclables and green waste) but we'll take that option when it comes.

Here's Wollongong Council's guide to being waste-wise which we think is a pretty good read.


Sunday, February 6, 2011

Saving electricity and CO2

Everything's gone a bit Dorothea McKellar

In the last few months Brisbane was underwater, Queensland and Victoria were ravaged by floods and everyone else seems to be getting heat waves, record rain, floods, plagues, bush fires or snow storms.

In the news this week there were two stories which really got our attention and have burnt themselves into our subconscious.  The first says that we're got little chance of keeping climate change to 2 degrees (the limit where things might still be manageable) and we're on track for 4 (genuine biblical proportions stuff). The other one is that electricity prices are going up again and are set to double every 5 years.  Eek, it's enough to drive you to despair. 

What can we do?  Well for the Joneses, it was time for us to do what we do best, be the Joneses we want to see in the world, and show people what we're doing (including the mandatory mistakes we make along the way so that you don't have to).

Today we went back to the drawing board to see what we could do, whether we'd done the right things and what else we can do.  We're pleased to report that we're not doing too bad and some things are paying off.  Here's a bunch of stuff we did to reduce our electricity consumption since we moved here nearly two years ago.

Tackling the big things first

The electricity in our part of the world comes from coal fired electricity which is relatively cheap in the short term but is one of the most carbon intensive forms of energy.  We wanted to get away from this.  

We looked at gas but our town doesn't have access to gas infrastructure, which means if we want gas we've got to buy it by the bottle and have it trucked in.  While possibly less carbon intensive than buying electricity, it just didn't resonate with us.

We paid the extra for Green Power and the first electricity bill was so outrageous that we just couldn't afford it.  Somehow we were consuming twice as much power as we had been at The Newtown Cottage.  We also were pretty sure that electricity companies have to have a mandatory portion of renewables, and by us paying for Green Power, all it was doing was paying them extra money to let them off the hook and didn't achieve much unless they'd already hit their targets.  Not a good option.  

We looked at solar panels, but our roof gets a lot of shade and doesn't get enough sun to make sense.

Also it seems that a large part of the increased cost of electricity is due to capacity limits of the grid during peak periods, so the real key is reducing demand.  Reducing our consumption without compromising our lifestyle was clearly the go. So the most sensible option was to invest time and money now in things which will save us time and money for many years to come (and lots of electricity and carbon emissions too).

You can spend a lot of time, effort and money on things which help a little, but don't really make much of a dent in your electricity consumption. So our first step was to focus on the big things first.  Here's a chart of the energy use of a 'typical' Aussie household. 

Source: http://yourhome.gov.au/technical/fs61.html
This gave us a good hint on where to start.

Now this data is for the typical household, so we looked at the big areas and if they looked inefficient at our place then we figured they were over the average.  Our two big ones were hot water, and heating and cooling, which we figured accounted for around 65% of our electricity bills and at least 50% of our emissions.

Hot water

We were horrified to see that hot water for the house came from two electric storage hot water systems, but because that there's no gas here we can understand why they were installed.  Given that this would be using at least 25% of our electricity this was the smartest place to start.

Needless to say we were really happy when the building report said they were at the end of their useful lives and needed replacing almost immediately.  We were also stoked to see there was still a hot water rebate available to get rid of inefficient hot water systems which would pick up about half of the cost.

As a rule of thumb traditional solar hot water systems trump everything else, followed by instantaneous gas.  Everything else is horribly inefficient.  We went with the best solar system we could afford, which was about double the price for a traditional Edwards/Solahart unit, but also twice as efficient and should last twice as long.  Other than in high use days in winter our hot water is pretty much free, even though we're in an area with two hours less daylight than most people due to being on the low side of a ridge to the north and having a lot of overcast days.

Savings: $180 per annum at current prices.  4-5 tonnes of CO2 - about the same as taking a light use hybird car off the road or planing 23 trees.

Was it worth it?  

Definitely for guilt reduction.  On a financial basis alone it'll pay for itself in about 8 years, and then keep on giving for another 20 or so.  Money well spent.  And we also got to meet Stephen from Viabuild who introduced us to permaculture, so that was a big bonus.

Would we do it differently next time

If we were city and strapped for cash we'd go instantaneous gas every time, but for where we are it was definitely the right move.  We'd definitely do it again.

Here's the skinny on our system.

Heating and cooling

Most of our appliances are reasonably efficient, we've got low wattage lightbulbs in and turn off the big appliances at the wall.  The computers are laptops.  We got rid of the big inefficient clunky hotplates that take 2 hours to heat and and cool and replaced with an efficient convection system. With this out of the way we figured the bulk of our energy use comes from heating and cooling.

The Joneshack is a 108 year old weatherboard house, built in the days before insulation. Weatherboard houses are great because you can cool the place down quickly in summer when the evening breeze comes in, but they're also hard to live in on really hot and cold days.

Mrs Jones was keen to put her mark on the new place.  We opted for ceiling fans with lights in them - they are stylish and functional, and besides, have you been able to find a tasteful light fitting anywhere that looks good with compact fluros?  The fans are great to avoid having to use the aircon, and the bright lights come in handy when the energy efficient floor lamps aren't bright enough.

We planted a nice deciduous tree in front of the main north facing windows to allow heat and light in during winter and keep it out in summer, and have trees shading the west side of the house to keep the hot afternoon sun out.  Deciduous fruit trees are growing in front of the east facing windows to deal with summer morning sun.  These will take some time but will be wonderful when established.

We moved in just before winter and were struck by how cold the house got compared to our previous place in Newtown.  There was no heating in the house - the previous owners had used fan heaters in every room, which means their power consumption must have been astronomical. This could not stand.  The Jones do not abide.

We looked at the various options, and decided that reverse cycle induction airconditioning was going to be the most cost effective option for heating and cooling.  As crazy as it sounds, induction systems can be highly efficient for heating because they extract heat from outside rather than having to create it from scratch.  Similarly they transfer heat outside of the house when in cooling mode and it means only shelling out cash once instead of having to buy a heater as well as a cooler.

In the short term while we were understanding how the house works, it meant we could turn the portable heaters off, saving a small fortune and oodles of CO2, and put the hot water bottles away and stop watching the steam coming off our breath while indoors.

But it still wasn't working.  We figured we must be losing heat out of the windows and doors.  So we sealed the doors, and put in some air tight window covers (we opted for wooden shutters, they have better thermal performance and for 50% more than the price of blinds, they look a lot better and last a lot longer).

Still no good.  We turned the laundry into an airlock so the dog can get in and out without a draft.

Still no good.  We got someone around to give us a quote of underfloor insulation, which is where we figured the last 15% might be, and it turned out that there was no insulation in the ceiling. We'd squandered our rebates on the hot water service, but for under $1000 we were able to get the Battman to do our roof with R4.0 pink batts.  Superb job, and what a difference that made.

Months later, it's still wasn't quite working out.  We'd been unable to find anyone to supply or install underfloor insulation and with our uneven joists and bearers, everything was a strange size and not square. We finally sourced and installed some Foilboard underfloor insulation in a few of the rooms and the difference was noticeable immediately in the rooms we'd done.  It's an awkward job, but pretty easy once we got the hang of it and one we should have got to earlier.  The guides say that there's only 15% energy efficiency to be picked up in insulating floors, but for us it feels like a lot more.

Was it worth it?  

Mrs Jones says definitely, she doesn't like extreme heat or cold much.  Mr Jones doesn't cope with humidity so he's happy too.  The reality is without the inverters, and insulation the place would have been unbearable during the winter and in the heatwave during the last few days.

Since installing all the kit, Mr and Mrs Jones are both spending nearly twice as much time at home and our power bills have remained more or less flat even when they should have jumped significantly.  The fact that someone is at home nearly all the time and we're still tracking below average household power use, even without gas is a pretty good outcome.

All up we've spent about $5,000.  It's hard to work out what our power bills might be without all the kit, but if we say an extra 10% on our bills, that's about $150-200 per annum, so about the same result as the hot water system, so about the same bang for buck ignoring rebates.

Would we do it differently next time

Your insulation is only as good as your biggest gap. In our case we learned this the hard way. We spent time looking for gaps, only to miss big ones. If you're going to do insulation, particularly in a weatherboard house, don't do it a bit at a time, do the lot at once.  Also if you've got an attic, don't overlook this, it needs to also be insulated, including the floor and roof cavity.

If we were a bit more confident we would have put a wood stove and bricked around it.  This would have given more thermal mass to maintain the temperature in the house rather than just heating or cooling the air, and the stove could cook, heat the house and give the hot water system a boost in winter.  

We'd probably spend the extra and get an induction cooktop instead of a ceramic one.

Summary

We pretty much did a lot of the text book things to our house, and they all seem to work, but have taken us time to get right.  We'd agree with the text books though:

1. Change to solar hot water, or instantaneous gas if its an option and you're short of cash.
2. Deciduous trees as first option around the house to deal with the summer heat while allowing winter sun in - they're the cheapest option.  If we were to do it again, we'd spend more and get more established trees.
3. Get as much thermal mass into the centre of your house as you can (which we didn't do), and have as little thermal mass around the outside of your house as you can (check).
4. Insulate the house well (in progress)
5. Efficient heating and cooling solutions.

This should give you the biggest bang for buck while you're also tinkering around the edges.


One of the best resources we've found is the Your Home Technical Manual and the fact sheets are available free online.  We found it invaluable, to the point that we could talk rings around the Green Home assessors.  We'd suggest having a really good look at it.  It's clear, simple and very very useful.

The Joneses
Be the Joneses you want to see in the world

Wednesday, February 2, 2011

Integrating your worm farm into your vegie patch

I've been a bit worried about our worm farm for a while now.

We've had our worm farm for around 5 years and it's served us well for our inner city lifestyle when we had nearly no gardening space. Indeed, the worm farm probably got us turned on to all this home-scale permaculture stuff in the first place, so much so that we started giving them to people as Christmas presents.  So we owe it a great deal.

They are truly a wonderful system particularly for tiny back yards and balconies but since getting our quarter acre on the urban fringe a number of things have been bugging me.

The vegie patch is on the north side the house to get the sun and be near the kitchen, but the worm farm is on the south side of the house to keep it cool.

Not being near the kitchen means that that putting scraps in the worm farm is an additional chore rather than something you do on the way to play in the vegie patch.

Not being near the vegie patch means that harvesting the castings and liquid fertiliser is something you need to find time to do, and have to cart to the vegie patch rather than being automatically fed into your soil when there's rain.

Being out of sight out of mind is not good for any key elements in your system and a good way for it to be neglected. Not what you want for a living system.

Most purchased worm farms are raised above the ground, which means the worms have nowhere to escape to on hot days. Alas the ones I gave to people died of heat, and with yesterday's heat wave mine are really not looking well at all.

After 5 years the colony should be mature, but they're still not able to keep up with our vegie scraps.

This whole business of multiple layers and trays just makes things complex. When is the bottom tray ready? Why is the top tray always full before you're ready to add a new tray etc.

All in all, what had served us well in the city wasn't working for us any more.

It was then that we saw the idea of a worm tower on Milkwood's blog. This makes a lot of sense so we've decided to give it a go. Have a look at their website for more detailed instructions, or better still do one of their courses, but here's what we did.

Step 1 : Buy a 65 cent plastic bucket

Yes, that's right, 65 cents.
 Step 2: Drill it full of holes with a 10mm drillbit, or whatever drill bit you've got lying around that is big enough to allow the worms in and out. If you don't have a drill you can burn holes with a soldering iron, or can use it for target practice with a .22. (My redneck past is coming out, you can never get away from it entirely).
Soak 1 newspaper in water.  Shred the paper, then drill holes in the bucket.

Step 3: Soak some newspaper in water and tear it up. Half fill the bucket.

Step 4: Add some compost worms and a bit of well wetted straw if you've got it.

Step 5: Fill the rest with newspaper

Finished product, croc shoes come pre-drilled.

Step 6: Dig a hole in a place where you want soil fertility.  Plant it in.

Plant it in, nearly up to the rim.
 Step 7: Put an air / light cover on top to keep the critters out (in our case an old bird bath)
Inviting eh?

Step 8: Let the worms settle in, then start feeding them scraps under a thick wad of damp newspaper. (My worms love newspaper, they leave castings all over it)

There's a lot of reasons why we like the idea.  Here's a few.
Traffic flows
  1. The worm farm is near the kitchen and kitchen garden. This means it's integrated into where we spend our time associated with food harvesting, food preparation, planting etc. Dealing with the worm farm is no longer a separate chore, it's just part of what happens in zone 1.
  2. The worms now do the work of improving the fertility of the soil without us lifting a finger. Liquid nutrient leeches into the soil and the worms can go out and spread their castings when they feel like it.
  3. The worm farm is now protected from daily temperature fluctuations.
  4. It's no longer an industrial looking thing, in fact most people wouldn't even know it's there.
  5. It's cheap and easy to replicate. By having multiple worm systems in the vegie patch like this it means if one has problems, the others can keep going. It also means we can scale up to the size needed to handle our vegie waste by adding more 65 cent buckets. 
  6. There's a bird bath in the our system which looks nice, is good for bird habitat and attracting pest predators.
  7. It's about 1/100th the cost of buying a worm farm in the shops.
Now like most things on this blog we're bound to make a few mistakes, so we'll post updates as we learn things along the way. Once we're confident we'll start replicating them.

Most people use a taller system using a bit of PVC pipe for these worm towers. We thought that was a bit expensive, unsightly and too much like hard work (okay, the real reason was we couldn't find any PVC pipe). We thought of using other materials, the cardboard tubes out of carpet rolls for example but the buckets seemed a winner for now. Even better would probably be a food-grade bucket from a local restaurant – they're food grade, but also free instead of a whopping 65 cents.  We might do this for the next ones.

If people do try out this worm tower, we'd love you to make a comment and share what you've learned in making and running yours.  Always good to compare notes.

The Joneses

Monday, January 24, 2011

Lunchtime photos

Usually when we blog on here we talk about something we've learned which we want to pass on (usually as a result of making a few mistakes first).  Today we ducked out the front to grab some tomatoes for lunch and thought they were worthy of a picture or two.
Two ripe tomatoes without even leaving the balcony.

Front yard as vegie patch (formerly rose garden).

Tomatoes growing apple tree.  Worked well last year.

Corn as a front fence while the hedge grows.

Chilis and corn seem to like each other.

Two different varieties of tomatoes for lunch.

Friday, January 14, 2011

More experiments in building soil life - and these ones worked!

It's been wet here lately.  Not wet like the floods that everyone else seems to be getting hit with, but wet nonetheless.  My local weather site tells me we've 10 rain days this year (it's now day 14), putting at least 15mm into the ground over the last week (rainfall > evapotranspiration by 15mm).

This time last year our front garden beds were barren.  Sure the roses and weeds were doing well, but otherwise the soil was lifeless.  If you dug up a handful of soil, it had no smell.  There was no visible life in it.  No worms. No bugs.  Nothing other than ants baking in the sun and creating a moonscape.

The previous owner had worked really hard on those garden beds.  She'd weeded and put in manure regularly, but when we arrived there was no visible humus at all.  Was it because the plants were heavy feeders?  Were there was too many of them?  Or perhaps because it was baking in the sun without shade or mulch?  Too many chemical remedies perhaps?

We hadn't really decided what to do with that garden bed.  Maybe we were going to plant natives, but probably not vegetables. So we did the obvious - layers of wet newspaper and covered it with some lucerne hay and whatever mulch we could find.  In our case, bags of tee tree mulch because we hadn't got onto a cheap source of good local mulch yet.  This helped slow the decline, but didn't do much to improve the soil.  We figured we'd plant a few things anyway and see what worked, including a few food plants. Nothing prospered, other than the broad bean experiment and the results of that were not immediately apparent.

We figured it was the local climate - nothing grows here we thought.

So imagine our surprise when we paid our local seed saver a visit, and saw his patch growing like crazy.  Same climatic conditions, same microclimate - he's the next village along down from us.  Clearly we were doing something wrong.  And it seemed the answer was the soil.  Time to stop messing around and get focused. 

In the last few weeks we got rid of a heap of the heavy feeders (roses mainly). We spread all the compost in that we'd built up over the last little year or so on top of the tree tree mulch, put in a handful of castings from our worm farm just under the mulch near each food plant, and covered the lot with woodchips from a local tree lopper to keep it moist.  And then it rained and gave everything a really good soak.

This week we have soil life.  Heaps of it!

When putting in a couple of plants from the local nursery, we discovered soil was moist, cool and full of life. Worms, slaters, other bugs. The weeds have gone.  Clover (a great nitrogen fixer) has appeared, and so have small mushrooms which are having a great time eating and breaking down our mulch.  It's starting to look like the complex ecosystem of a rainforest floor with nitrogen fixers and fungi doing all the work for us.  Just the thing for for a damp climate.

Clover and fungi hard at work. They invited themselves to dinner.


And our plants are now starting to grow like crazy.  Tomatoes are about to abound.

Happy days.

Tuesday, December 28, 2010

Zucchini Fritter stacks

Zucchini must be the easiest vegetable to grow.  I'm only just putting mine in now but my neighbours were kind enough to give me a couple of large ones (marrow) and a handful of grape tomatoes.  Lunch looked so good I thought I'd take a photo of what I often eat during the warmer months.

It's a very cheap meal to make, particularly if you've grow your own and have your own chooks.

Ingredients (12 fritters)

2 eggs
1/2 a small zucchini (or a slice of marrow if you've left it grow too long)
A spoonful of vegetable or chicken stock
Plain flour to thicken (amount depends on how wet the mix is)
Pinch of Salt and pepper

Method

Whisk the eggs into a bowl
Add the grated zucchini
Add the seasoning (stock, salt, pepper)
Add flower until mix is stiff

Heat a pan to medium
Add a splash of oil
Add 1-2 spoons of mix per fritter
Flip when bubbles start to appear in the mix
Flip again when brown
Serve

Yummo!

Friday, October 15, 2010

Gloom, doom and bad news

Every day the newspaper seems to be full of bad news and it was getting us down.  We thought we'd do something about it

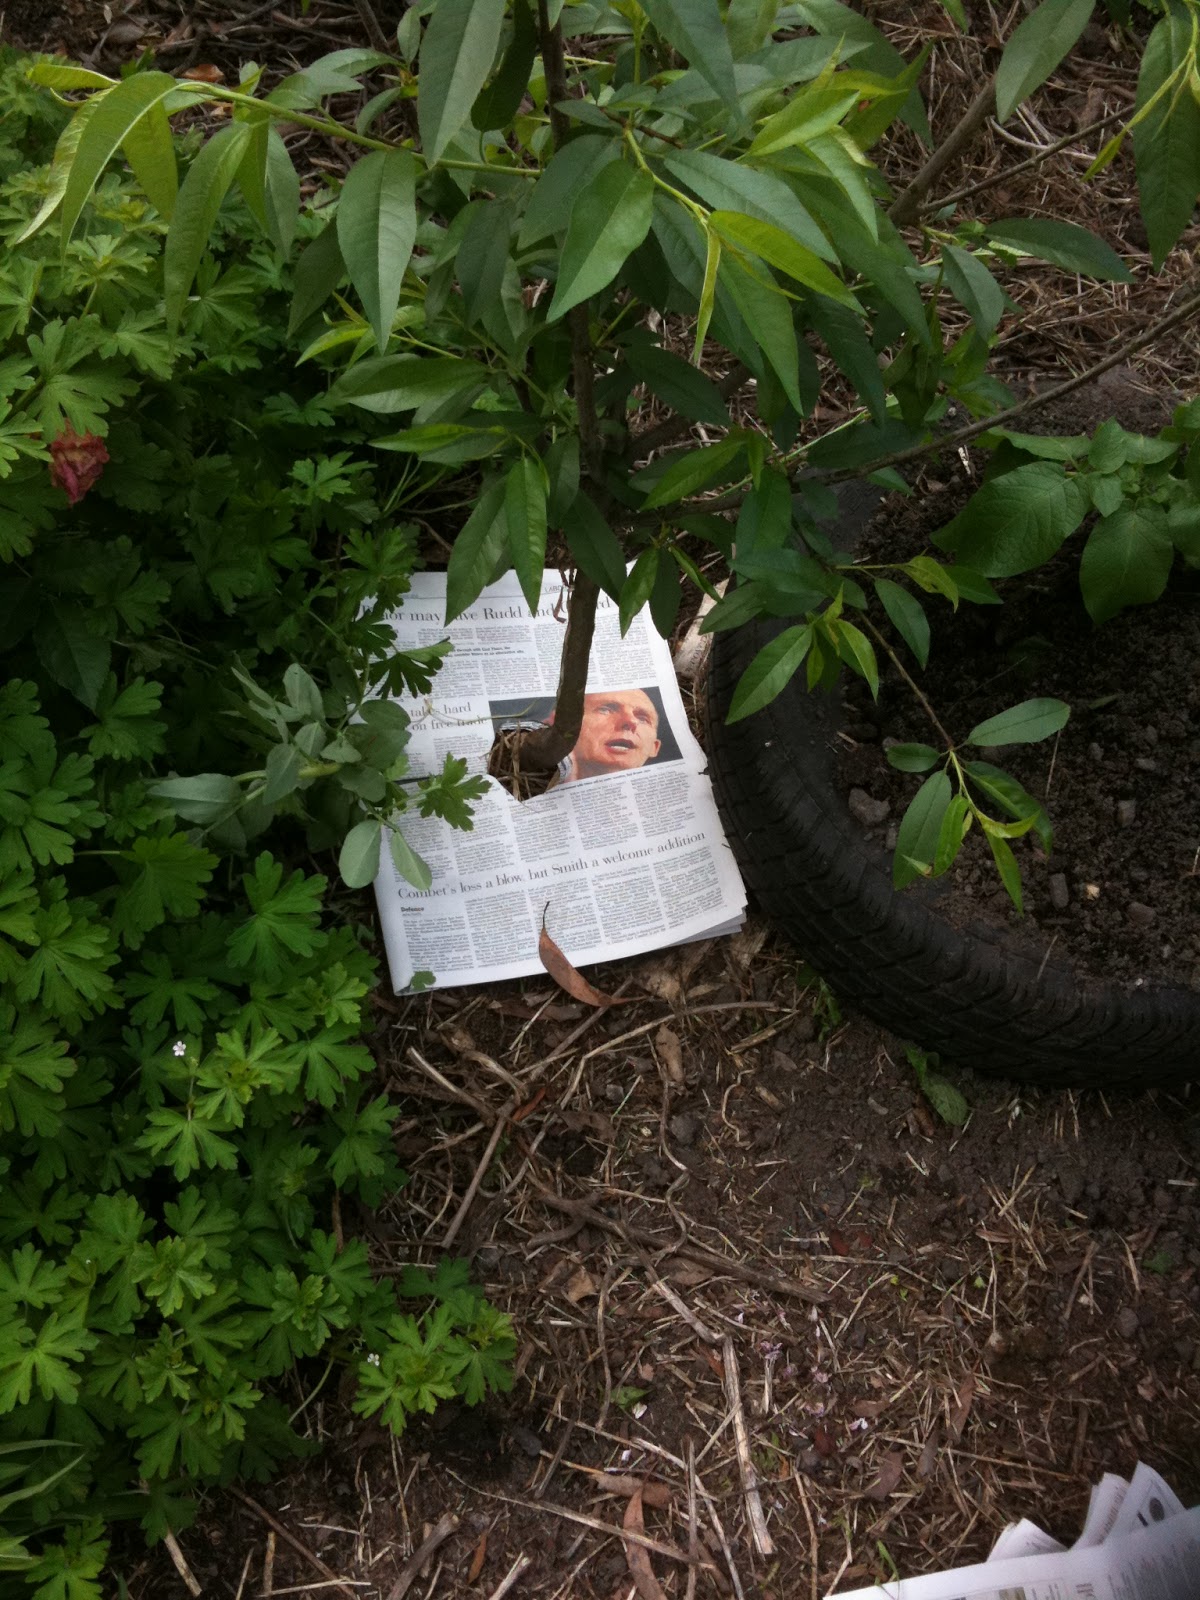
Bad news is great mulch.

Bob Brown mulching my fruit trees.  Makes sense I guess.

Before - weeds out of control and moisture loss

After, bad news turned into good under a layer of more mulch.
.

Problem solved.  We feel better already.  Thanks newspaper companies, we think you're just great.

The Jonses

Note:  This gag is blatantly stolen from Bill Mollison's Global Gardener series.  You can check out the original footage on YouTube below where he talks about the difference in working in the sub-topics vs other climatic zones.

Monday, October 4, 2010

Be the Joneses you want to see in the world

We discovered this video a few months ago, and it's absolute gold.


Mr Jones likes to think that he's the 3rd guy in the video (because he's really cool).  We suspect the reality is we're just part of the mob somewhere, and if we're at the front of the pack in our local community and setting a prominent example, well that's just dandy.

One thing this video doesn't mention is the importance of a shared narrative (the music).  We suspect that a shared narrative is an important part of this, and is possibly more important than the acts of the dancers. Food for thought, time to collect some eggs.


The Joneses

Sunday, October 3, 2010

The weed opportunity

"We don't have a weed problem, we have a weed opportunity."  
The Joneses
Chooks like grain, and grain is not always practical to grow in a domestic situation.  Sure we're planning to plant some native grasses for seed along the edge of the chicken coop when we finally get around to building it, but in the interim we're buying in a sack of grain and pellets every few months to supplement the girls free range diet.  Buying in anything takes energy and money, so this is a good place to apply your mind to closing the loop in your own garden.

Well, remember our chicken / legume guild from a few weeks back?  The idea was to build up our soil in the front yard using the power of the almighty legume, while also using the plants as fodder for the chooks.  The chooks in turn would eat / scratch / aerate the piles of legume plants to build up our soil at the side of our property, while the discarded plants keep the dust down and gradually turn themselves into soil.  (This is covered in more detail  in this blog entry).  So far this experiment is going well.

Anyway it's been raining which means the soil is moist and weeds are easy to get out.  Our prospective vegie patch is still full of weeds, so it's been a good time to pull some out and add to our "weed / chicken guild".  We thought we'd post a few photos.

Weeds in bed with the lilli pillis and broad beans. Yum.

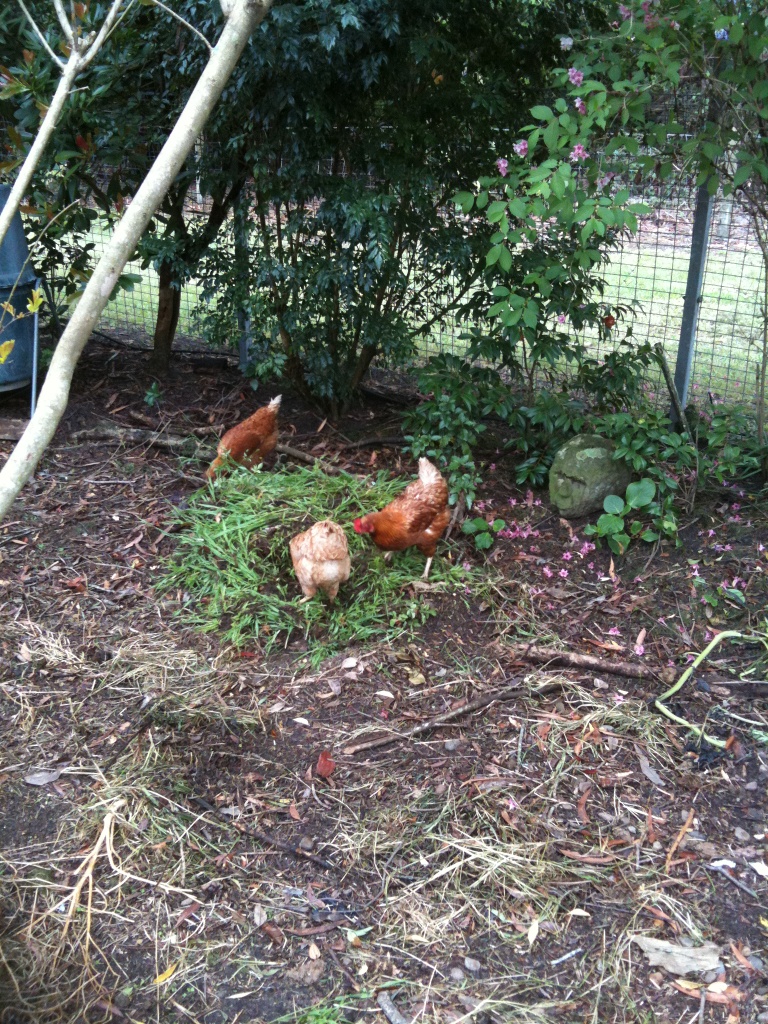
The girls at work in under 30 seconds.  Everyone's happy.
Our chickens (Marjorie, Penny & new edition Ethel) love weeds so there's none in our back yard.  In fact, if we didn't have the front yard fenced off from the girls, we'd have no weeds left for them at all.  How tragic that would be.

Wednesday, September 29, 2010

Potato tyre stacks - part 2

Attempt #2, Penny scratching around
Back in June (winter) I attempted my potato tyre stacks for all the reasons in our original post.  At first things went well, but alas after a period of rain the plants seemed to die off. The tyre stacks were on some concrete, and I assumed that they had become waterlogged and had rotted the tubers.   Moving the stacks slightly to allow drainage didn't seem to help - it seems I was too late.  Meanwhile my neighbours' potatoes dug into the ground seemed really healthy, so the whole experiment seemed to be a failure.  Key learning here - get your drainage right if you're in a high rainfall area!

It's the start of spring here, and everything's coming to life, including a few potato plants from tubers I'd planted in the grounds last season. The fruit tree area is probably going to have a chicken under story at some point, so while chicken manure is great, I'm not sure I want too much concentration in the potatoes in case of pathogens.  So with healthy plants establishing, and it being the right time of year, it's time to do the experiment again.
Not much of a yield, but not a complete failure.

So reusing the tyres from the last stack, I've put these around one potato plant with the aim to stack it about 5 tyres high over the growing season.  In theory the whole stack should fill with spuds, including some under the ground and the soil should be really healthy in the stack without any pathogens.

When grabbing the old tyres, I found a whole bunch of tiny new potatoes, so it seemed the original attempt didn't fail after all, and with patience we might have got there in the end.  We've dug these in elsewhere in the garden so they might surprise us at some point in the future.

Interestingly enough, also in the old stack were the fattest worms we've seen at our place - about twice the size, which is telling us that the little micro-ecosystem in the stacks is very healthy indeed.   Good to know.

Friday, September 24, 2010

Experiments in building soil - chicken / legume guild


Rough site map, rich soil in the SouthEast Corner only


When we bought our place it was high maintenance.  Things needed pruning, mowing, watering, fertilising or weeding weekly and if you didn't stay on top of it, things got out of control.  And it did get out of control for a while.  Mr Jones had to quit his job to find the 2 days a week to maintain the place.  This was way too stressful, too much like hard work and producing too little yield. So we let things go a bit to see what nature would do if you weren't constantly fighting with her.

Some things worked, but some got even more out of control.  The north east part of the site is the driest area with the poorest soil, and is also the animals' favourite area.  They really liked our newly established lawn and decided to dig it up and turn the area into a dust bowl.

Out the front (north side), we ripped out a lot of the high maintenance plants (rambling roses), covered the ground with wet newspaper and tee tree mulch to build up the soil and keep the weeds down.  This helped a lot, and now we've got lots of soil critters improving our soil for us, but with spring setting in, the weeds are back and prolific.

So the big question - how to turn the animal and weed problems into opportunities?


Coming into season
Dad's remedy - broad beans

Legumes are wonderful things.  They take nitrogen out of the air and put it into nodules on their roots while also producing a crop.  When they die off  or are pruned the nitrogen is left behind in the soil.

So in the front yard we planted broad beans and peas.  We've already had a good yield from the snowpeas while they're busily competing with the weeds and fixing our soil  The broad beans have been prolific and are now starting to give us a yield as well.

I was never a fan of broad beans (used to have them thrown at me / shoved down my throat as a kid), but we're giving them a go again (recipes appreciated).  The great thing about broad beans is you can buy a huge bag of seeds from the health food shop for less than two bucks, and they grow like crazy.
Hedgerow, shade, moisture, weed control.


We deliberately over planted the broad beans, and have pulled out a number of the plants once they got to 2-3 feet in height.  These go into the animals favourite area, providing a ground cover to keep the moisture in the soil while the chooks turn them slowly into organic matter.  So for 2 bucks and about 30 minutes of effort over the last couple of months, our dust problem is reduced and our soil is being improved in both plots.


Has bean - white nodules are nitrogen goodness.
Weeds

Our chickens love weeds, particularly when they're starting to  produce seed.  We were putting these into the compost, but if you don't get your compost hot enough then you perpetuate the weed cycle, and our compost area is in an area where the soil is rich anyway which means carting it.  Besides, who really wants to have to turn compost every week?

Again, the solution, pull out the weeds, throw them into the chicken's favourite area and they'll keep the dust down and become food for the chooks.  If a few survive to stabilise the area, and be a pioneer for other plants, then that's just fine with us.

Yum, fresh produce in the dust bowl.
So this method solves a few problems, and gets plants and animals doing more of the work so we can get back in the hammock to hatch more clever plans on how to get nature working on our side

There's always a way to improve the system and make it more productive with less work required.  For us, this was a simple way to tweak the system and turn problems into opportunities with almost no incremental effort.
Change direction and nature starts working for you.

Wednesday, August 4, 2010

Everything you ever wanted to know about hot water and more

This is the story of the Jones family and our choices of hot water.  We've had a lot of people ask us about it, which means some people are thinking about keeping up with these Jonses.  The experiment is working!


In this article we'll take you through how we made our decisions, why these may or may not be the right decisions for you and what our life's like with a solar evacuated tube system on our roof.


Energy options, constraints & greenhouse gases

The Jones family lives in an area where there's no natural gas connected, so for energy here we've got several options:
  1. Use coal fired power which is relatively cheap but is a huge contributor to global warming
  2. Pay a bit extra to buy Greenpower from the grid, but also knowing that a lot of energy gets lost between where it is generated and our front gate
  3. Have natural gas delivered which is less CO2 intensive than coal, but has to be trucked to our gate in diesel trucks
  4. Generate as much as we can on site.
Naturally we liked option 4, but needed also to be realistic with living within our means.

When we first arrived at Jones Manor, there were two off-peak electric storage systems, totalling just under 200 litres.  This would have made perfect sense at the time. Off-peak is cheaper and can be delivered within existing capacity of the grid, and at the time, global warming wasn't well understood and energy saving options weren't as viable as they are today.  Great case for a retrofit.

So you can imagine our delight when our building report told us our old electric systems were nearing the end of their useful lives, were at risk of failing and would need to be replaced.  Solar water rebates were also available which was going to help a lot (these are still available, but not as generous as they were).  Considering that hot water is the largest single source of energy use and greenhouse gas emissions for most homes (around 20-25 per cent of household emissions), this seemed to be a great place to start and solar was the obvious choice.

Choosing a hot water system

We did our research - the usual places: ask your friends, ask Google, ask your Dad, talk to some providers, try and cut through their spin and bias and then try and find some authoritative sources and buyers guides.  In our case the most useful sources were the Your Home Technical Manual, the Alternative Technology Association and Mr Jones' Dad.  (Yes Jones Sr, we did ask you first and all our research proved you right, but don't get a big head about it).

We did some comparisons between solar flat panels (the types that have been an Australian icon for many years) and the new fangled evacuated tubes which hit the market in the last few years.  What we consistently heard from a number of sources was the solar evaluated tubes were nearly twice the price of flat panels, but were worth the extra money because:

  1. They are nearly twice as efficient, which means you don't have to run your coal powered electric booster as much on cloudy days
  2. The tubes handle hail better and can be replaced one tube at a time if they get damaged
  3. A stainless steel tank with the system should last for a good 25 years, which could be twice as long as normal.

Knowing that the flat panel system on Mr Jones dad's house was a disappointment because it's booster seems to be running most of the time, and also wanting something to last until the rest of Mr Jones beard turns grey, we decided to give this new fangled contraption a go.

Our phone calls and background checks seemed to indicate Apricus was the brand to go with, so we gave them a call and they introduced us to our new mate Stephen from Viabuild who was the local agent and experienced guru on the product.  Now you've got to be careful with a bloke like Stephen, because you'll quickly realise that perhaps you don't know everything about sustainability, and next thing you know Mr Jones will be doing a Permaculture Design Certificate and wanting to know how to build an earthship and live in the desert, but that's another story.


Fit for purpose
Anyway, Stephen took us through it all and looked at our limiting factors.  There were four in particular:

  1. A ridge line and huge Lilly Pilly tree to the North-East which gives us about 1 less hour of direct sun in the mornings
  2. A ridge line and large trees to the North-West which give us about 2 less hours of direct sun in the afternoon
  3. Heritage limitations which mean the tubes must be flat, and slightly sub-optimally placed
  4. Practicalities which mean the tank needed to be on the ground instead of in the roof.
Our new fangled solar tubes. mid-afternoon, winter.
As a result of this we decided to go with a 30 tube array and a 250L stainless steel tank, which is enough for a reasonably sized family with minimal boosting, even in winter. And for a couple it should require nearly no boosting at all, even on cloudy days in winter.  

The reality - what's it actually like?

We've had our system nearly 12 months now and we love it.

Our configuration means we've got a pump and a controller, which is really clever.  The controller measures the temperature in the tank, and also in the tubes on the roof.  When the tubes are 8 degrees hotter than our tank, the pump turns on and sends water from the bottom of the tank (coldest part) to the tubes on the roof and brings back hot water.  If there is only a 2 degree difference, it turns itself off, and waits for the tubes to get hot again.

There is a big display on the controller which shows these temperatures, which means most males and anyone techy / geeky will be out looking at it every few minutes for a month or so and probably keep doing this for the first year or two.  It's a bit like watching the display on a Prius and getting excited about braking... actually, now that I mention it...  {Mr Jones wanders outside to take photos as an excuse to look at the display and see what the system is doing} 

Controller 12 months on with a few cobwebs
Sorry about that, back now, but here's a two photos.  It's 2pm which means we've got another hour or two of direct sunlight to go.  As you an see, the temperature on the roof is 57 degrees, and the ambient temperature on the back verandah (below) is 15 degrees.  It's a sunny winter's day here, and the bottom of the tank was at around 15 degrees this morning because we deliberately ran the system down.  The bottom of our tank is 54 degrees, which means the whole thing is toasty warm and an ideal temperature, all free from the sun.  

Ambient temperature in the shade
So the important thing is whether we actually saved all that electricity or not.  The answer to this is yes and no.

As we indicated before, our placement is suboptimal.  The unit is laid fairly flat which means we're getting around 8-10% less input than we'd normally get.  Also because we're on the low side of a ridge, we're getting around 5-6 hours of direct sun instead of 9-10, so deduct another 40% for that.  And lastly this is a very cloudy place, so it's overcast regularly which brings most things to a slow churn, so it seems the gods are against us our little experiment and we should be doomed to failure.

But, we didn't fail, it's been a great success.  Take today for example, it's a winter's day, and our hot water for the day will be free apart from running the pump (which is negligible energy and cost). Free. No booster like Mr Jones' dad.  Free.  Woohoo.

In spring through summer and autumn, we turn the booster off entirely when there's just Mr & Ms Jones at home and only turn it back on on really cold cloudy days or when we've got guests.  The system can keep up with sort of behaviour except when we get a few cloudy days in a row.

So if every day was like today, the system would pay for itself in 5-10 years, and still keep giving for another 15 or so, so that's not bad for a system which is severely handicapped by where it's located.  It's also worth noting that electricity prices will double every 5-10 years and continue to heat the planet, so it starts becoming an obvious thing to do.

Also it's good to know that because the tank is stratified and shows the coldest part, which means even when it's really cold in the tank (say 15 degrees), you've probably still got enough for two hot showers from the top half.  And on a warm day, we've clocked 146 degrees on the roof (the pump shuts off to protect itself above 83 degrees).

So these are the tangible bits, and the stuff you need to know so that you're not kidding yourself.  But for us there was something much more important.  

The moment we installed the tank, was the moment we became the Jonses.  

We live on a street with a lot of foot traffic on it, and at least a dozen people have stopped to ask us about our disco tubes on our roof.  We also put a few pictures on Facebook and people asked us questions. We were able to tell them all about it and now some are looking into it closely, and are doing it too, or had already done it.  It was at this point we realised how much impact you can have by being the new Jonses or following some other Jonses.  One day we might even be able to spell Jonses.

Lessons and what we'd do differently

If we had our time again we'd probably consider a thermal siphon, which is basically a fancy name for having a tank on/in your roof that self-circulates without needing a pump.  Simply, hot water rises and if your tank is above your panels you don't need a pump.  If your tank is below your panels, you do need a pump, which means moving parts and a small amount of energy to run the system.

Why would we do this?  Well our pump died after 11 months, just gave up the ghost, and we wouldn't have noticed if our power bill didn't look unusually high, so it might have been dead for a while.  Having said that, we still had hot water because the off-peak booster kicked in, but we generated a few black balloons without realising it.  The Apricus team were great, replaced and installed a new pump in less than a week at no charge and it seems we're one of their only pumps to ever have failed, so hopefully this is an isolated problem.  This is all pretty impressive for new fangled technology.  

Now if we had a tank on/in the roof, there would have been no pump, and nothing to die on us, which is nice to know.  But it also might have meant reinforcing the roof to carry the extra 250 kg of weight, and there wouldn't have been a cool gadget to look at {Mr Jones leaves the room again...}.  Quick update from Mr Jones, the tank has increased in temperature by 3 degrees in the last 30 minutes.  How cool is that?


The Jonses
Be the Jonses you want to see in the world


Useful references for digging deeper

Your Home guide - what type of system should I get?
Your Home Technical Manual - Hot water
Hills fact sheet: solar tubes vs flat panels


Monday, July 12, 2010

Will the real Joneses please stand up?

""Keeping up with the Joneses" is a catchphrase in many parts of the English-speaking world referring to the comparison to one's neighbour as a benchmark for social caste or the accumulation of material goods. To fail to "keep up with the Joneses" is perceived as demonstrating socio-economic or cultural inferiority... often causing conspicuous consumption and/or overconsumption."  Wikipedia

This blog plays on the idea that there is a new version of the Joneses who realise that consumption or financial wealth doesn't always make you happy, but quality of life and other things like giving back to society and having time for family and community do.  For those who didn't immediately get the joke in the description of our site, our tag-line tilts our hat at the notion of being the change you want to see in the world.  And this is a very big movement we're part of.  Look at the success of the Prius for example, compared to the Honda Civic.  A post-mortem on why the Prius dominated the market, was it didn't look like their existing similar model (Carolla), so people could drive around showing that they were keeping up with the new Joneses and wanted to do something about climate change, without having to wear tie die shirts, grow a beard, attend a protest rally or be ostracised by their neighbours.  Nearly everyone likes the idea gardening, socialising, spending time outdoors, or chickens, but not everyone likes a hippy.  If you're reading this, you'll be well aware that green is the new black.  Hippy is so 1960, eco-friendly is so 2010 and you get to buy all this new stuff too! (irony intended).

Anyway Mr Jones (the fictitious dad caricature of our abun-dense project) decided to go a permaculture art project on Saturday to see if he could learn another thing or two about how to be the Joneses from other people who were doing the same thing in Surry Hills.

So we rocked up and introduced ourselves and our concept of the Joneses.  The response by the project director PJ, "Oh, cool, is your last name Jones as well?"  

"Oh, cool, is your last name Jones as well?"  

And so we met Patrick Jones, his partner Meg, and son Zephyr - the REAL Joneses.  Our name isn't even Jones.  How embarrassing is that?

In the day that followed, we got our hands dirty a bit, realised that our companion planting list has some very big gaps in it (we were asked to help out on that bit), but the big thing for us was watching the people - those walking by with puzzled looks on their faces, those jumping the fence to find out what was going on, those jumping the fence to get their hands dirty, those bringing plants, and some other Joneses doing inspiring stuff and acting as a beacon for new Joneses, like our new mates Costa, the crew from the Museum of Contemporary Art.  Probably 200-300 people got involved on Saturday to finish the project, all of whom now have some sort of connection with it.

If you're ever in Surry Hills, I'd recommend having a walk through the site to see how little space you need and how densely you can plant an abundant food forest.  And if you're ever driving through Surry Hills to the Eastern Suburbs down Albion Street and stop at the lights at South Dowling, look out your left window and you don't even have to get out of your car.

To find out more about that project, and to meet the real Joneses, have a look at their site, The Artist as Family.  Quite possibly, these Joneses are the Joneses we want to be in the world.


Oh, and if you want to see what our fake Mr Jones looks like, he's in their photo gallery from Saturday with his head down planting.